Microsoft Table allows for the inclusion of extra information about a larger data set without disrupting its layout. This article will explore how to create tables in Microsoft Excel.
Microsoft Excel is one of the most widely used spreadsheet applications. It allows users to create spreadsheets and analyze data with a variety of tools like formulas, charts and graphs. Microsoft Excel is often used for accounting, financial analysis, budgeting, statistical data analysis and more. It is a powerful tool for data analysis and tabulation.
Microsoft Excel is often used by accountants, financial analysts, budget managers, statistical data analysts, and more.
To create a table in Microsoft Excel, follow these steps:
- Open your Excel spreadsheet.
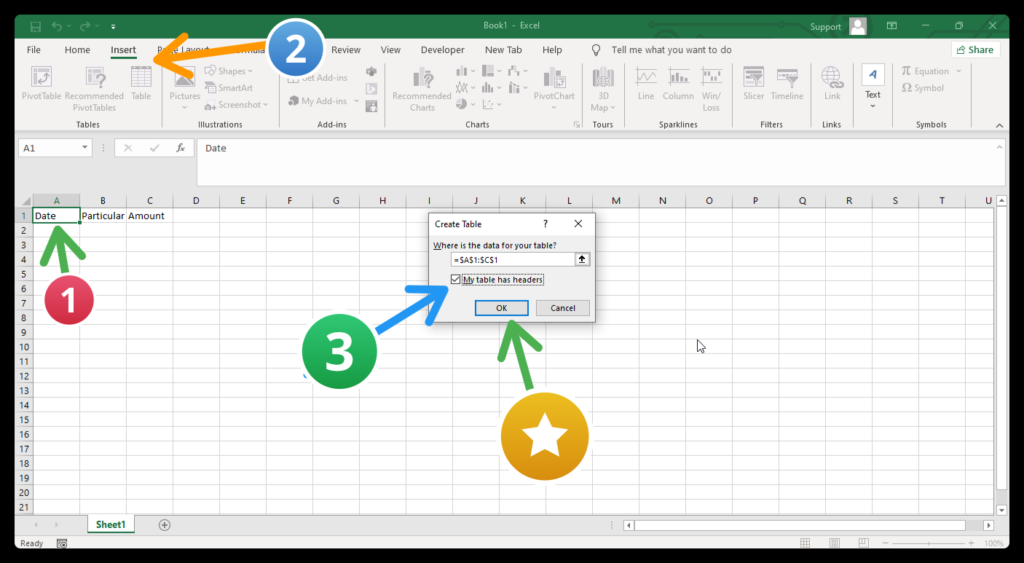
- Select the cells that you want to include in the table. You can either click and drag your mouse over the cells to select them, or use the Ctrl + Shift + arrow keys to select multiple cells.
- Click the “Insert” tab in the ribbon at the top of the window.
- Click the “Table” button in the Tables group. This will open the “Create Table” dialog box.
- Make sure that the range of cells you selected is displayed in the “Where is the data for your table?” field. If it’s not, you can either type in the range manually or click the “Collapse Dialog” button and select the cells on the spreadsheet.
- Check the “My table has headers” box if the top row of your selected cells contains column headers.
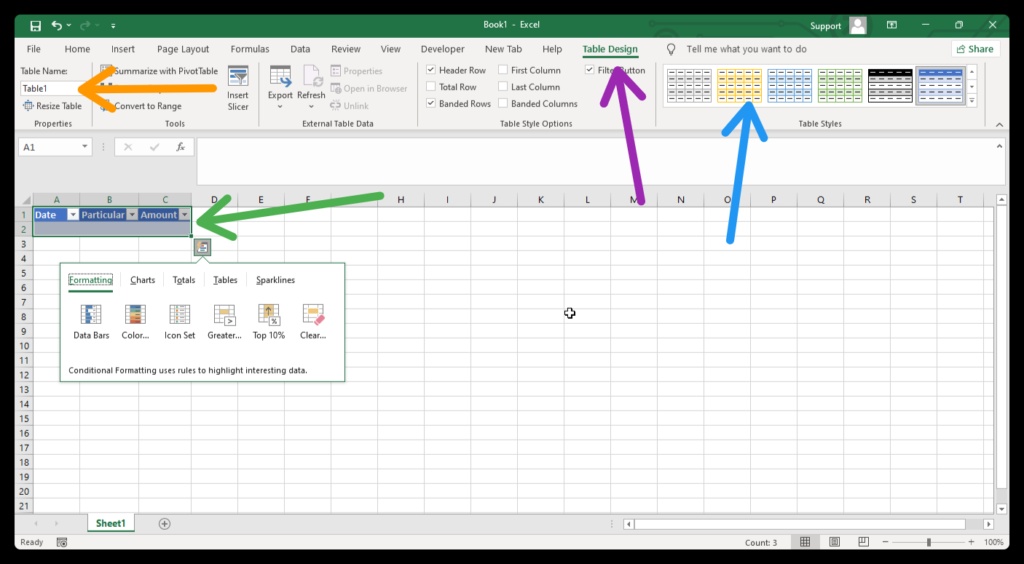
- Click the “OK” button to create the table. The selected cells will be formatted as a table, and the “Table Tools” tab will appear in the ribbon.
You can then use the “Table Tools” tab to customize the appearance and behavior of your table. For example, you can use the “Design” tab to change the table’s style, or the “Table Name” field to give the table a meaningful name that you can reference in formulas.


You can also create a table by selecting the “Table” option from the right-click menu, or by using the keyboard shortcut Ctrl + T.
Once the table is created, you can customize it by changing the table style, adding or deleting rows or columns, or formatting the cells. To do this, click on the table and then use the options in the “Table Tools” tab that appears on the ribbon.

